How to properly test your Dialogflow CX Agents (English)

In this article you will learn how to properly test your Dialogflow CX Agents
Dialogflow CX Testing strategies
Previous Requisites
Here are the technologies used in this project
- Google Cloud Account - Sign up here for free
- Dialogflow API enabled - How to enable it
- Dialogflow CX CLI - Install and configure Dialogflow CX CLI
Tests, tests and tests!
Testing your conversations ensures that the components of an agent are running properly at a level that includes the auxiliary infrastructure of the agent, such as the NLU, the webhook and the integration with external systems.
A test can evaluate the components of an application at a high level. We can tests check that two or more components of an agent work together and generate an expected result, possibly including all the components necessary to fully process a request.
These tests can be executed manually or automated in a continuous integration system and are executed in each new version of the agent.
Manual
Simulator
Dialogflow Console is a web interface where you can design your conversations by creating agents and within an agent, creating flows, intents, entity types, etc. On the Dialogflow Console, you can create and interact easily with your tests. To do that you just need to go to the Dialogflow CX Console: https://dialogflow.cloud.google.com/cx. This is what it looks like:
 Dialogflow CX Console
The console includes a really useful tool to manually test your agent. It is a simulator where you can interact with your agent to test that the conversation is flowing as expected. To start testing your Agent, you have to click on the Test Agent button located in the top-right corner of the canvas. When you start the Simulator, you will have to choose the environment, flow and page. To interact with the simulator you can just type text and send it to the agent but you can also set parameters, send events, etc. You can undo the last conversation turn every time you want.
Once you have finished with your manual interaction you can:
- Save the entire conversation as a test case.
- Replay the conversation automatically.
- Reset the conversation in case you want to start from the beginning.
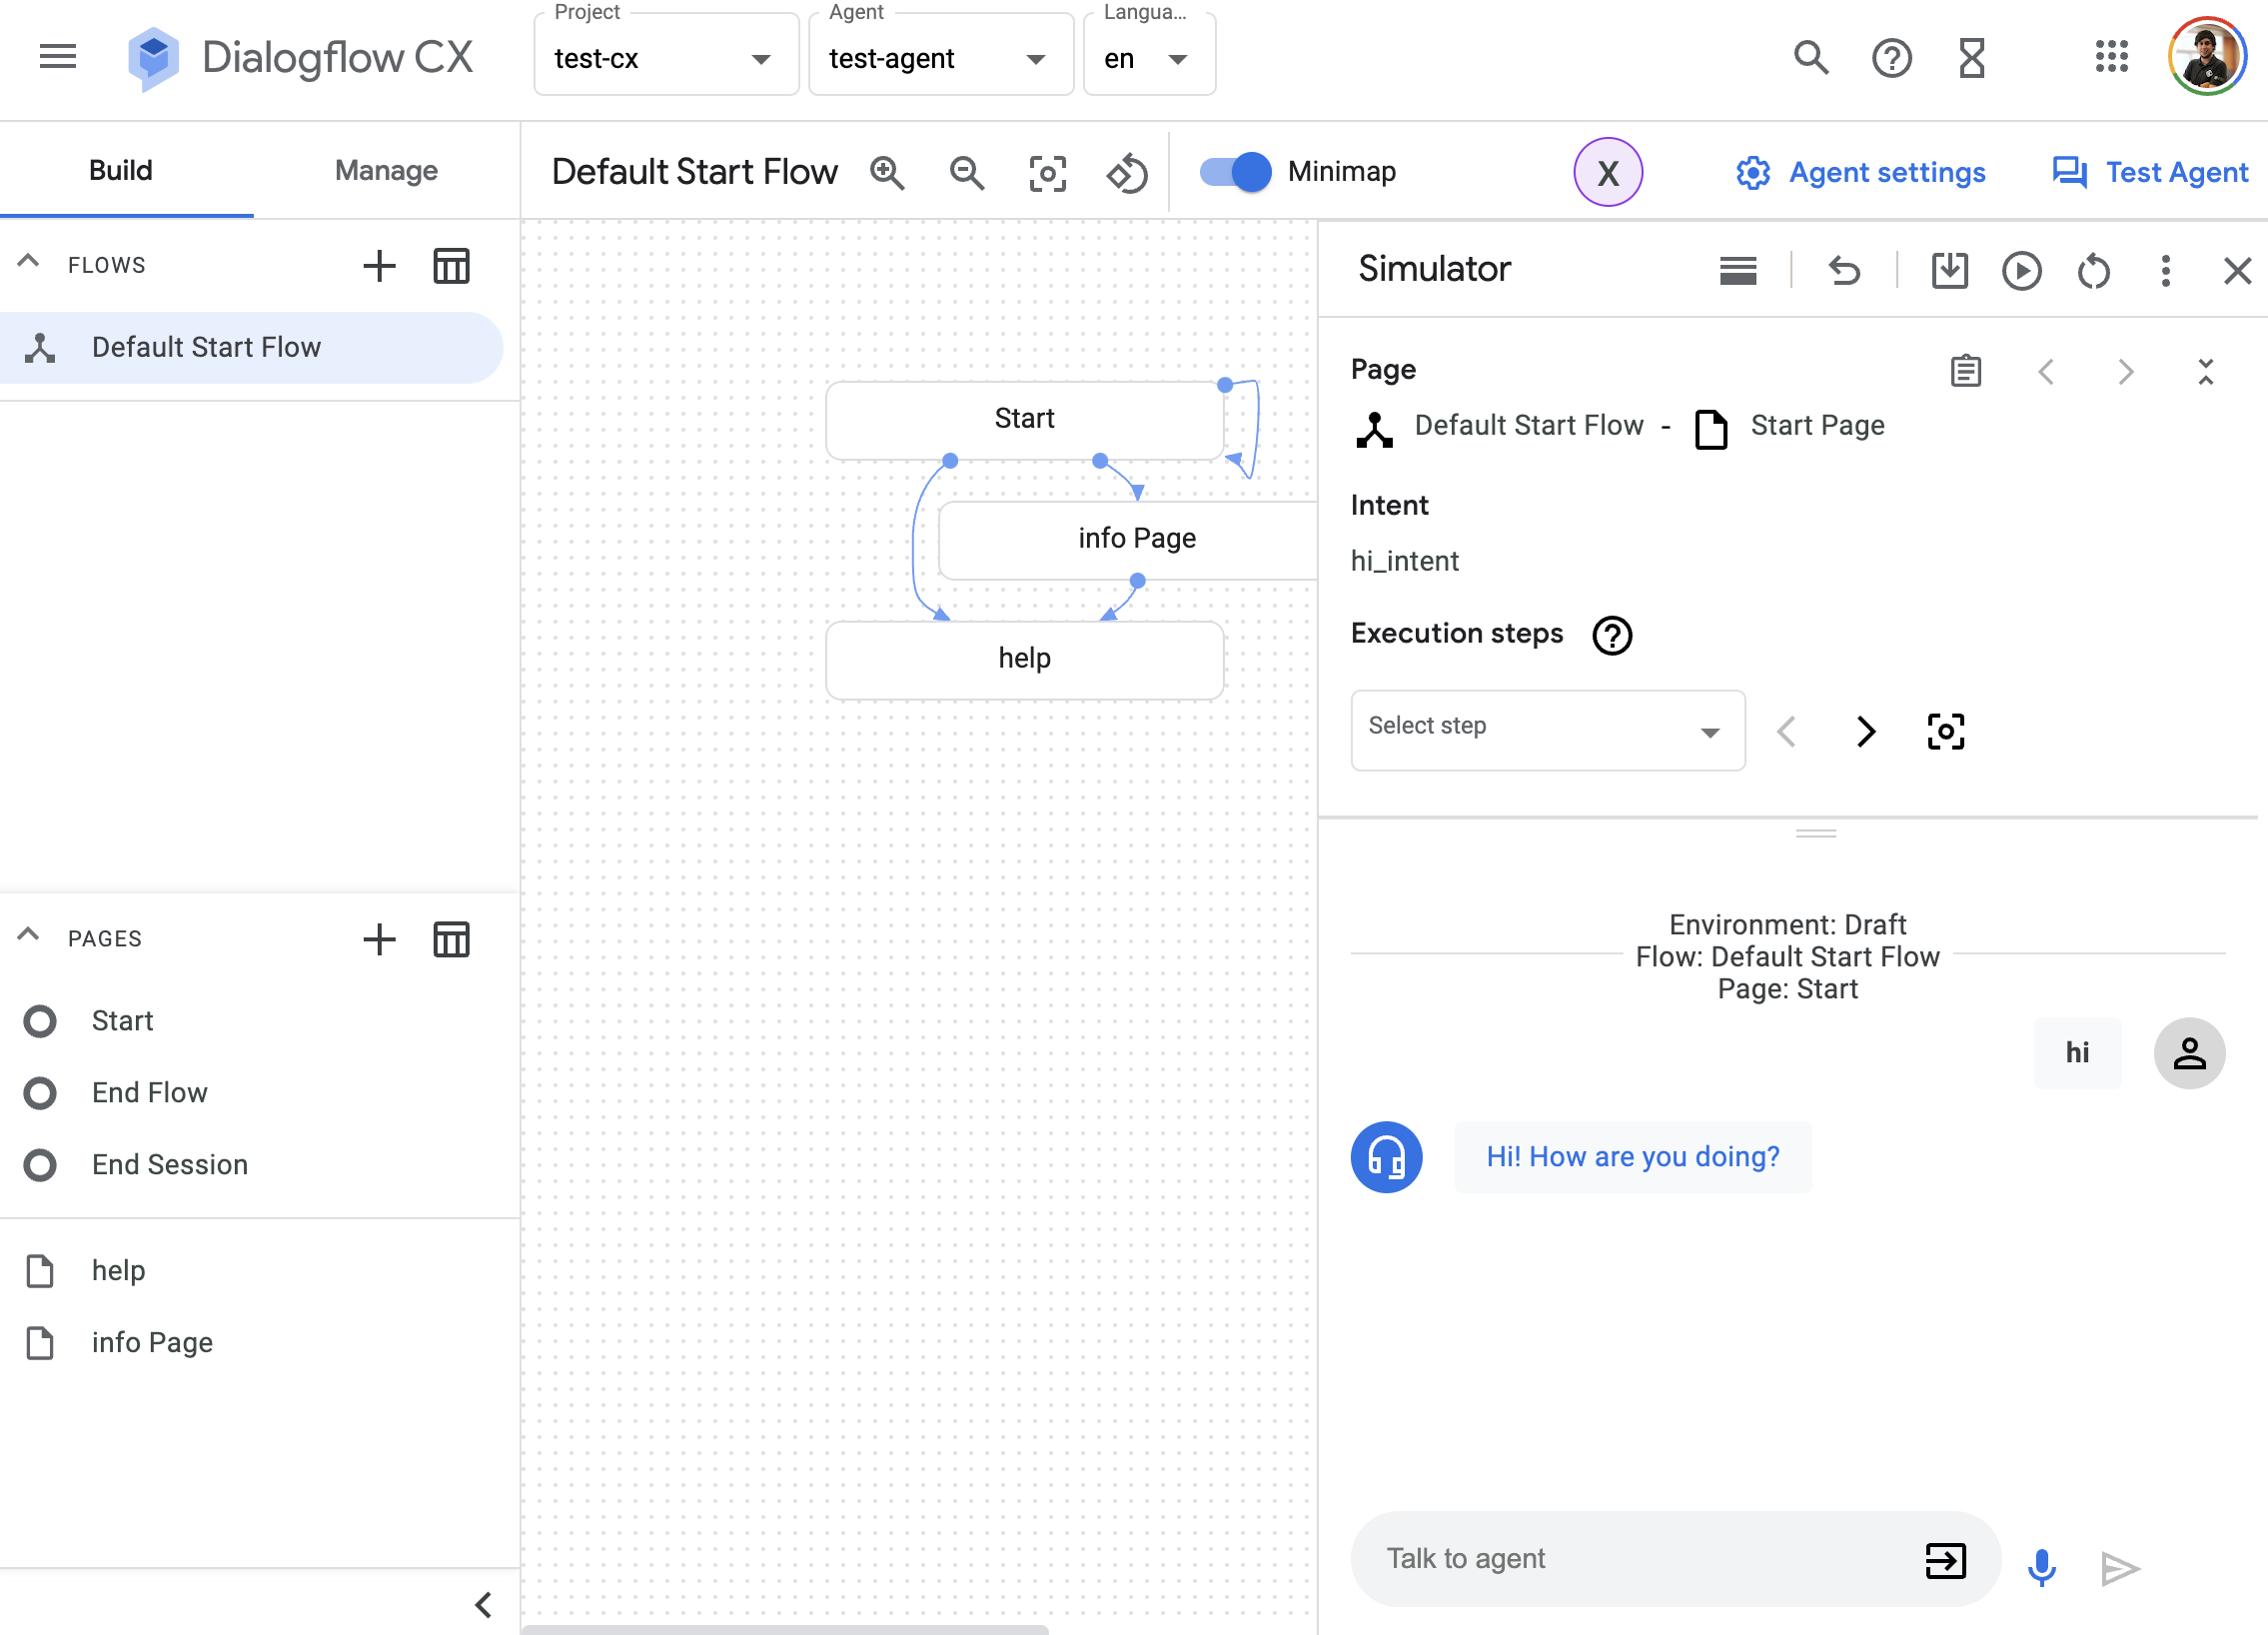 Dialogflow CX Simulator
Automated
CICD
In software, it is a common pattern (and a best practice) to have different environments where developers can deploy different versions of their software. Each environment has its configurations.
In Dialogflow CX we have the same concept, you can create a version of your agent and then, deploy it to an environment. Same with the webhook, you can deploy a webhook version and use that version in an environment.
When you saved a conversation that you have done in the simulator as a test case, you can add it to a continuous integration pipeline of a specific environment. You will find your CICD pipelines in the Manage tab and the clicking in the CI/CD section:
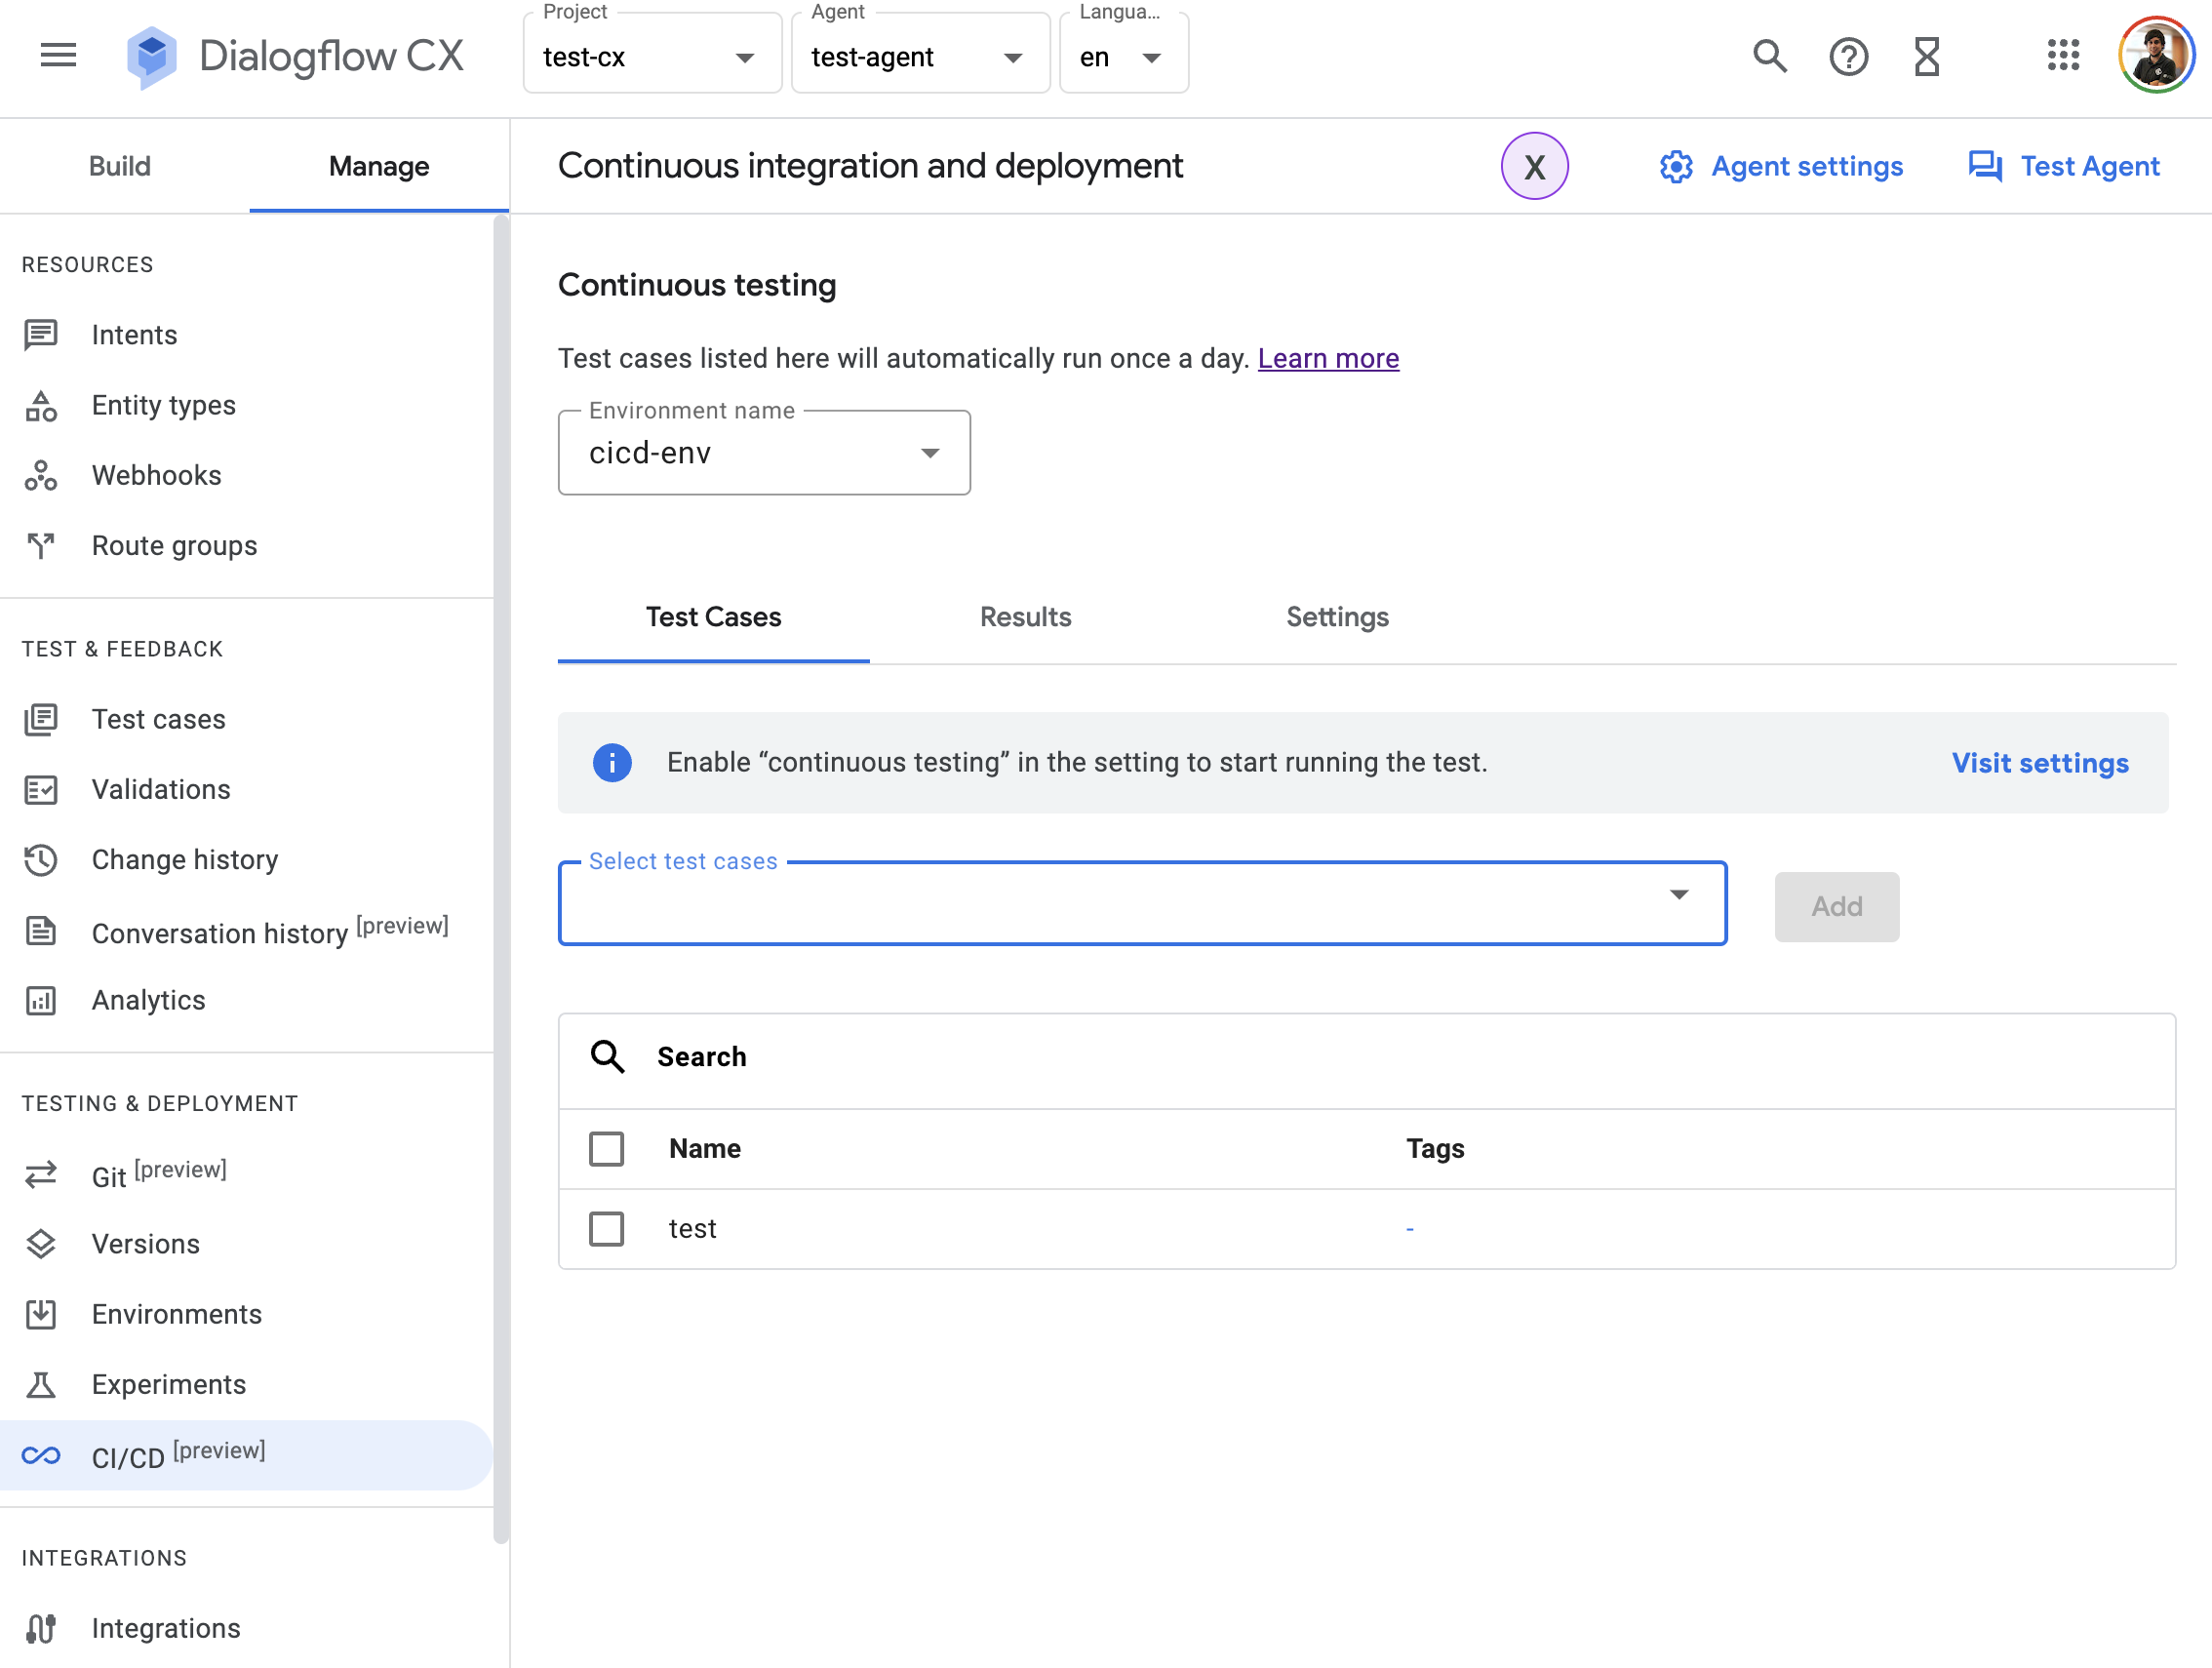 Dialogflow CX CICD
The Dialoglfow CX CLI or cxcli is a Command Line Interface Tool that you can use to interact with your Dialogflow CX projects in a terminal. It is an open-source project created by Xavier Portilla Edo. With the cxcli you can interact easily with your Dialogflow CX intents.
With the cxcli you can interact easily with the cicd pipelines of your environments of your Dialogflow CX agents.
You can find the cicd command usage down the cxcli environment execute-cicd command. You can read the documentation about this command here.
cxcli environment execute-cicd [environment] [parameters]
This a simple example of the cxcli environment execute-cicd command:
cxcli environment execute-cicd cicd-env --project-id test-cx-346408 --location-id us-central1 --agent-name test-agent
The command above will give you an output like this one:
$ cxcli environment execute-cicd cicd-env --project-id test-cx-346408 --location-id us-central1 --agent-name test-agent
INFO Executing cicd for environment cicd-env
INFO PASSED
NLU Profiling using Dialogflow CX CLI
Use the NLU Profiler to test user utterances and improve your agent’s interaction model.
With the NLU Profiler, you can see how utterances resolve to intents and slots in your interaction model. When an utterance doesn’t resolve to the right intent or slot, you can update the interaction model and try again. With the cxcli, you can see what intents Dialogflow CX considered and discarded. Then, you can determine how to use additional samples to train your model to resolve utterances to their intended intents and slots.
Every suite is executed in the Dialogflow CX session so you can test not only your NLU but also a conversation itself.
All the commands that you have available in the cxcli to execute the NLU profiler are located down the cxcli profile-nlu command.
This command will execute a suite which includes a set of tests. It is important to know which suites and tests you can build. Suites and test are defined as yaml files. You can run these suites from your terminal or your CI pipelines using cxcli.
To execute a suite, you have to run the cxcli profile-nlu execute command. For the usage, please refer to this page.
cxcli profile-nlu execute [suite-file] [parameters]
Suites
A suite is a yaml file with the following structure:
# suite.yaml

# Name of the suite.
name: Example Suite
# Brief description of the suite.
description: Suite used as an example
# Project ID on Google Cloud where is located your Dialogflow CX agent.
projectId: test-cx-346408
# Location where your Dialogflow CX agent is running.
# More info here: https://cloud.google.com/dialogflow/cx/docs/concept/region
locationId: us-central1
# Agent name of your Dialogflow CX agent.
# Notice: it is the agent name, not the agent ID.
agentName: test-agent
# You can have multiple tests defined in separated files
tests:
  # ID of the test.
  - id: test_id
    # File where the test specification is located
    file: ./test.yaml
You can find the full reference here
Tests
A test is a yaml file with the following structure:
# test.yaml

# Name of the test.
name: Example test
# Brief description of the test.
description: These are some tests
# Locale of the interaction model that is gonna be tested.
# You can find the locales here: https://cloud.google.com/dialogflow/cx/docs/reference/language
localeId: en
# A check is a test itself: given an input, you will validate the intents and the parameters/entities detected by Dialogflow CX
# You can have multiple checks defined
checks:
  # The ID of the check
  - id: test
    input:
      # the input type
      # it could be text or audio
      type: text
      # The input itself in text format. For type: audio, you have to specify the audio tag.
      text: I want 3 pizzas
    validate:
      # Intent that is supposed to be detected
      intent: order_intent
      # You can have multiple parameters/intents
      # Notice: this could be empty if your intent does not have any entities/parameters.
      parameters:
        # Entity name that is supposed to be detected
        - parameter: number
          # Value that is supposed to be detected
          value: 3
You can find the full reference here
Examples
- Simple example that demonstrates the NLU Profiler in action. Find it here
- Example that shows how to validate Dialogflow CX built-in entities. Find it here
- Full example with multiple user-defined entities and Dialogflow CX built-in entities. Find it here
- Example using an audio file as an input. Find it here
You can find more examples on our Github repo and the Examples page.
This a simple example of the cxcli profile-nlu execute command:
cxcli profile-nlu execute examples/suite.yaml
The command above will give you an output similar to this one:
$ cxcli profile-nlu execute suite.yaml
INFO Suite Information: test-agent
INFO Test ID: test_1
INFO Input: type: text, value: hi
INFO Intent Detected: hi_intent
INFO Input: type: text, value: hello
INFO Intent Detected: hi_intent
INFO Input: type: audio, value: ./audio/hi.mp3
INFO Intent Detected: hi_intent
INFO Test ID: test_2
INFO Input: type: text, value: I want 3 pizzas
INFO Intent Detected: order_intent
INFO Param order_type: pizza
INFO Param number: 3
INFO Input: type: text, value: I want 2 cokes
INFO Intent Detected: order_intent
INFO Param number: 2
INFO Param order_type: coke
Resources
If you want to check the full usage of the cxcli profile-nlu command, please refer to this page.
If you want to check the full usage of the cxcli environment command, please refer to this page.
If you want to learn more about Dialogflow CX testing, check the official documentation.
Conclusion
This was a basic tutorial to learn how to properly set your Dialogflow CX Agents. As you have seen in this example, creating tests and setting CICD pipelines either with the console or the cxcli is very easy!
I hope this tutorial will be useful to you.
That’s all folks!
Happy coding!